2D Animated Circles
I’ve been asked a couple of times how I made the 2D circles in Kyary animation. The disapearing circles are pretty common in motion and animations, and they’re surprisingly easy to do in Blender.

- Add a bezier circle (Add > Curves). Rotate it so it faces the camera.
- Open the curve properties and set the curve type to 2D. Also set the Fill to Both.
- Go into edit mode. Select all nodes by pressing “a” and duplicate them (shift+d).
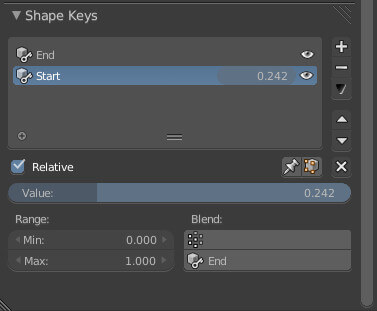
- Make a new shape key, this will be our end state.
- Make another shape key, scale the inner circle to 0.

- Rename “Basis” to “End” and “Key 1” to “Start” so you know which is which.
- We’ll animate the shape keys first, go to frame 0 and add a key in the slider value of the Start shape key (press i while your cursor is over the slider).
- Now go to frame 25 (or so), move the slider all the way to 0 and add another keyframe.

- Let’s animate the scale of the whole thing for the final effect. On Frame 25 add a keyframe for scaling (press i in the 3D view).
- Move to frame 0 and resize the circle to 0. Add another key for scaling.
Remember you want to have some time offset between the growth of the inner and the outer circles, so it’s not so mechanical. Also try playing with the interpolation in the graph editor for more variations. Have fun!