The Mayfair filter in Krita in 3 easy steps

So you have finished your newest Blender masterpiece, or have a photo that you wish could look better? How about an Instagram filter right in Krita? Today we will look at how we can replicate Mayfair.
This filter has a warm, pink tone with subtle vignetting. I’m also adding a bit of grain that wasn’t in the original filter (but should have!).

Desaturation
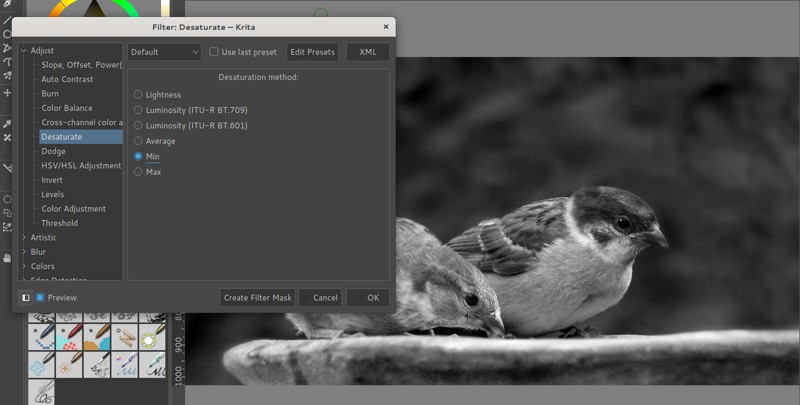
First we want to increase the contrast and lower the saturation of the image. So let’s start by duplicating the base layer (CTRL+J) and desaturate it (CTRL+SHIFT+U). Feel free to select any method you like, I used Min.

Now bring up Curves Adjustment (CTRL+M) to increase the contrast and squeeze them into an S shape.

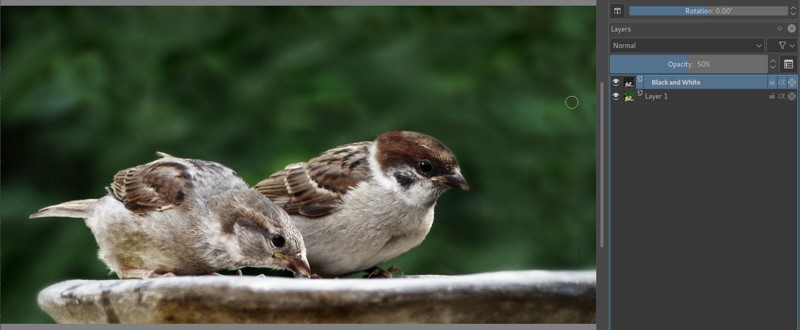
Let’s also bring up the contrast in the original layer. Hide the black and white one, and select the first layer. Apply the same curves adjustment.

Finally, enable the black and white layer again and lower its opacity to around 50%

Now, let’s also add some film grain to give it a more vintage feel.
Add some film grain
There are two ways we can add film grain. The best one is to just grab a film grain scan. These are actual blank films, usually 35mm or 8mm. You can find a couple of film grain scans here. Just download the images and drop them as a new layer in Krita. Easy and realistic. You can find more of them online, and there paid options too (mostly for film makers).
If you don’t feel like downloading, you can try using the noise filter. This doesn’t look as realistic but it does the trick. Start by adding a new layer and fill it with black. Now go to the Filter menu, and then Noise. Apply the effect with the default settings. Finally, change the blending mode to Soft Light and lower the opacity to about 15%.

Give it that Mayfair tint

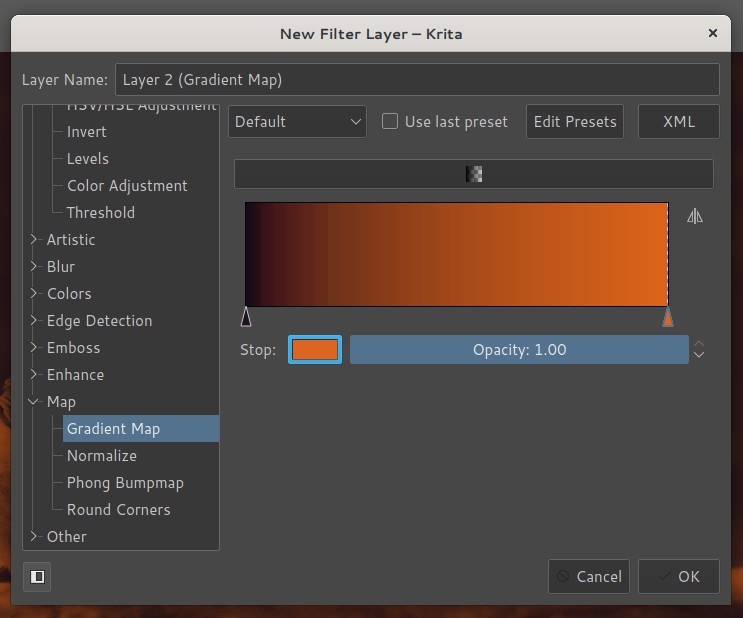
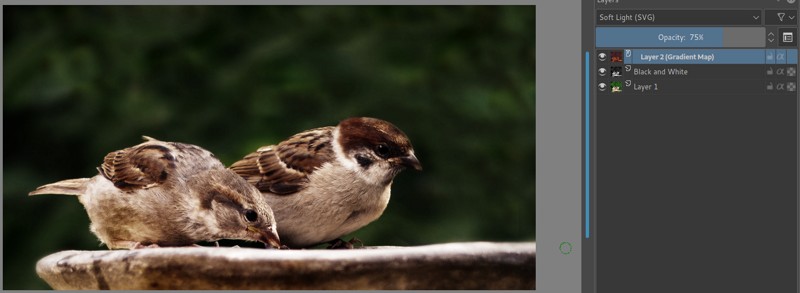
Now it’s time to add that classic warm tint. Add a new filter layer and select gradient map. Change the colors to be violet (#1e1224) on one end, and orange (#dd6522) in the other. Click OK and set the blending mode of this layer to Soft Light. Lower the opacity to about 80%.

Complete with a Vignette
Let’s complete the effect with a vignette effect. In photography, vignetting is a reduction of an image’s brightness toward the periphery compared to the center. They are often added to an image to draw interest to the center and/or to frame the center portion of the photo.
You can use the Vignette effect from G’Mic (Filter > Start G’mic QT) which is a one-click solution, but you would have to merge all layers first. While making a vignette manually let’s you keep the layers, in case you want to modify them later.
- Make a new layer
- Fill it with black
- Use the circle select tool (
J) to select the center of the image and delete it - Deselect (
CTRL+SHIFT+A) and apply a Gaussian Blur filter with a huge radius - Lower the opacity to about 10%

Did you make something cool with this effect? Accidentally found another cool trick in Krita? Let me know in the comments!