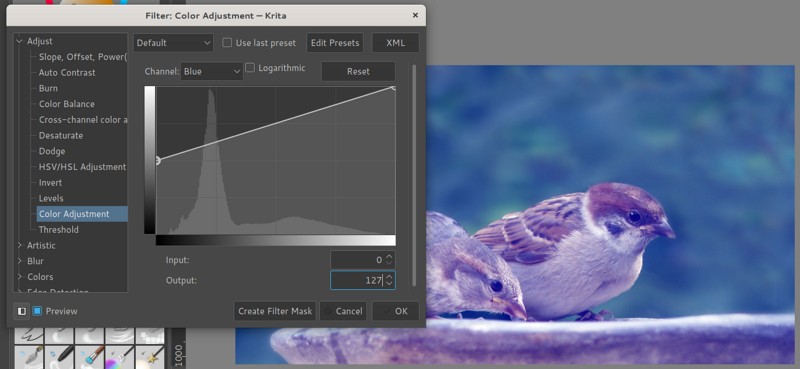
The Nashville filter in Krita step-by-step
Last time we replicated the Mayfair filter in Krita. Today we go colder with the Nashville filter. Nashville gives your images low contrast, high exposure and subtle warm tint mixed with cool blueish colors.

This filter is far harder than Mayfair so brace yourself for all of these 3 steps.
- Add a new Filter Layer and select RGBA Curves. Select the blue channel, and then the first node the curve. Increase the output value to 127. This will bump the blues in the image. Let’s call this layer “Blue adjustment”

- Next, add a new Fill Layer and set the color to
#f6ddadand set it to Multiply. This will bring the subtle warm tones. Let’s call this “Yellow Tint”. You can also use a paint layer and paint the color manually if you would like to experiment with different shades.

- Finally Add a new Filter Layer with the RGBA Curves filter. Grab the left most handle and move it up to lower the contrast. Then squeeze the rest of the curve in an S shape to increase the contrast of the rest of the values.

This effect can also use some film grain like we did in the Mayfair filter tutorial. Honestly, every vintage effect could use some good grain.
I hope you are finding these tutorials useful, let me know if there any other filters/effects you would like to see in Krita.